I have a confession to make: for the longest time, I didn't test my web applications on mobile devices very often. 🙈
A few years ago, I decided to figure out the easiest, most reliable way to test my development code on real mobile devices. And then I wrote this blog post, so that I had a handy reference for how to do it.
This tutorial shows you how to work with localhost on an iPhone. We'll discover an ideal workflow for making sure our products are rock-solid on iOS. It might be easier than you think!
Link to this headingThe Horizontal Scrollburglar
I was finally pushed over the edge when I ran into everybody's least favourite troublemaker, the horizontal scrollburglar:
This recurring nightmare was made extra-annoying by the fact that it wasn't reproducible from a desktop computer. Not even when emulating the device in-browser!
I needed to check this out on an actual phone to see what the heck was happening. This is a two-step process:
- Load
localhost:3000on my mobile device - Leverage the developer tools so that I can inspect the DOM and figure out the culprit.
Let's see how I did it.
Link to this headingAccessing localhost on an iPhone
My initial strategy was put my phone and computer on the same network, figure out my computer's IP, and visit it directly. I was able to get this to work eventually, but it took some tinkering, and requires tool-specific configSpecifically, you need to host your dev server on `0.0.0.0`, instead of `127.0.0.1`
With Gatsby, you can do this with a flag: `gatsby develop --host 0.0.0.0`. I wanted something more universal than that.
Next, I looked into network sharing. There is supposed to be a way to selectively enable access to a USB-connected iPhone. This process was a hot mess, with several scary-sounding prompts:
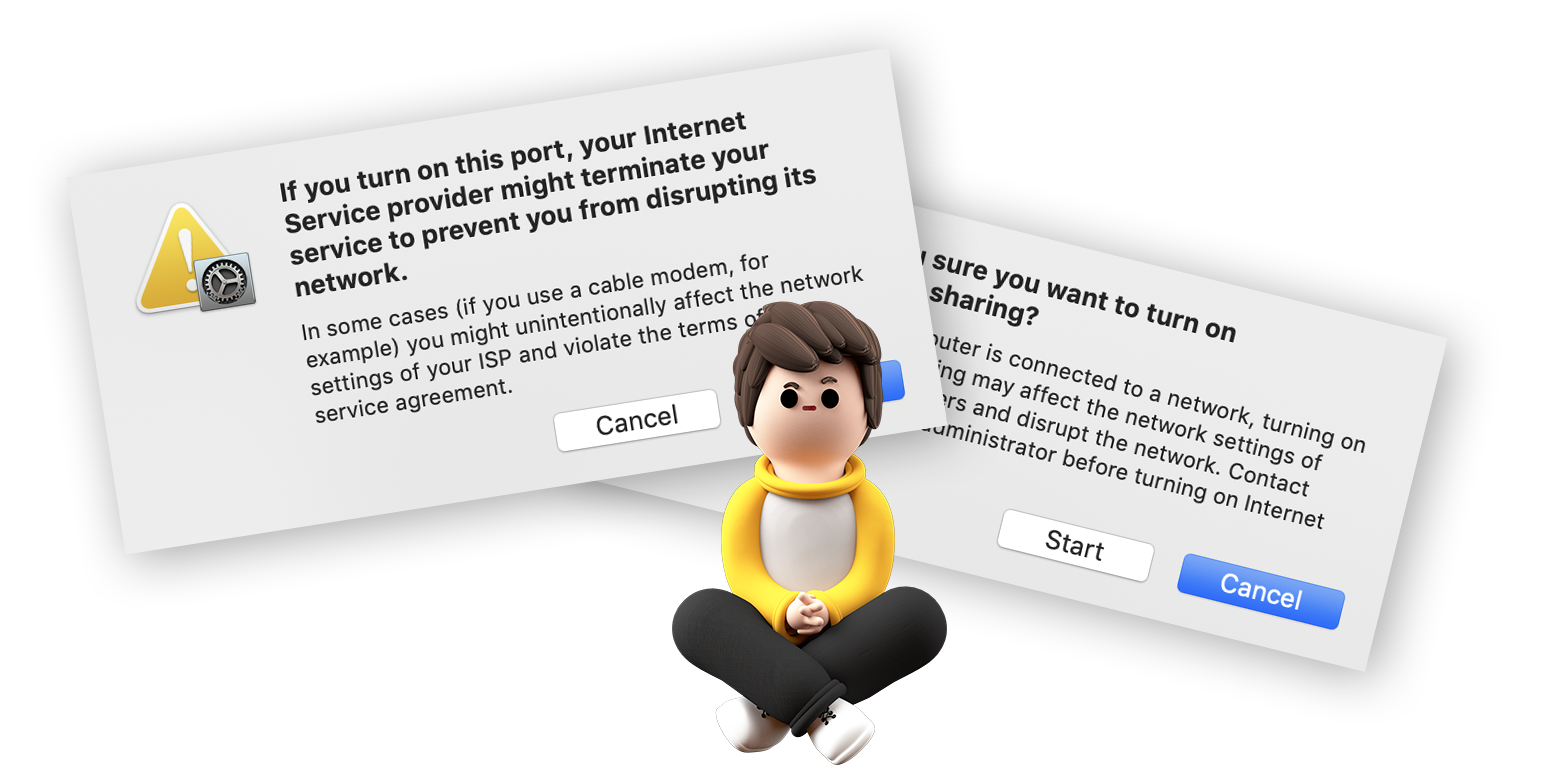
I'll spare you the rabbit-hole story, but even after agreeing to these prompts, I did not find success.
Happily, there's a brighter path. We can expose a specific port to the net, and access it like any other page!
There are lots of tools to do this, but my favourite is ngrok(opens in new tab).
Link to this headingWhat is ngrok?
ngrok is known as a tunnelling service. You run some software on your computer, and it burrows through the firewall and your router settings and makes a specific port publicly-available, while the process is running.
There are multiple services like this, including localtunnel(opens in new tab) and serveo(opens in new tab). In my experience, ngrok has been the most reliable.
There is a paid version, but the free tier is more than sufficient for what we need.
Link to this headingGetting set up with ngrok
Here are the steps to get set up with ngrok:
- Sign up(opens in new tab) for a free account.
- On the dashboard, locate your authentication token. Copy it to the clipboard.
- Download(opens in new tab) the desktop client.
- Unzip it. Unlike many desktop applications, this one doesn't need to be installed. It provides a process you can run through the command line utility. Most developers keep it in their home directory (
~/ngrok). - Open a terminal, and
cdto this directory. - Authenticate by running
./ngrok authtoken <YOUR_AUTH_TOKEN>. Paste the authentication token we copied earlier.
With this, you should be all set up to tunnel out of your network!
Link to this headingUsing ngrok
We can expose our local development server to the internet using this command:
$ ./ngrok http 8000The first argument is for the protocol; It supports HTTP and HTTPS, depending on your dev server. The second argument is the port; because my blog is a Gatsby site, it runs on port 8000.
You should see some output like this:
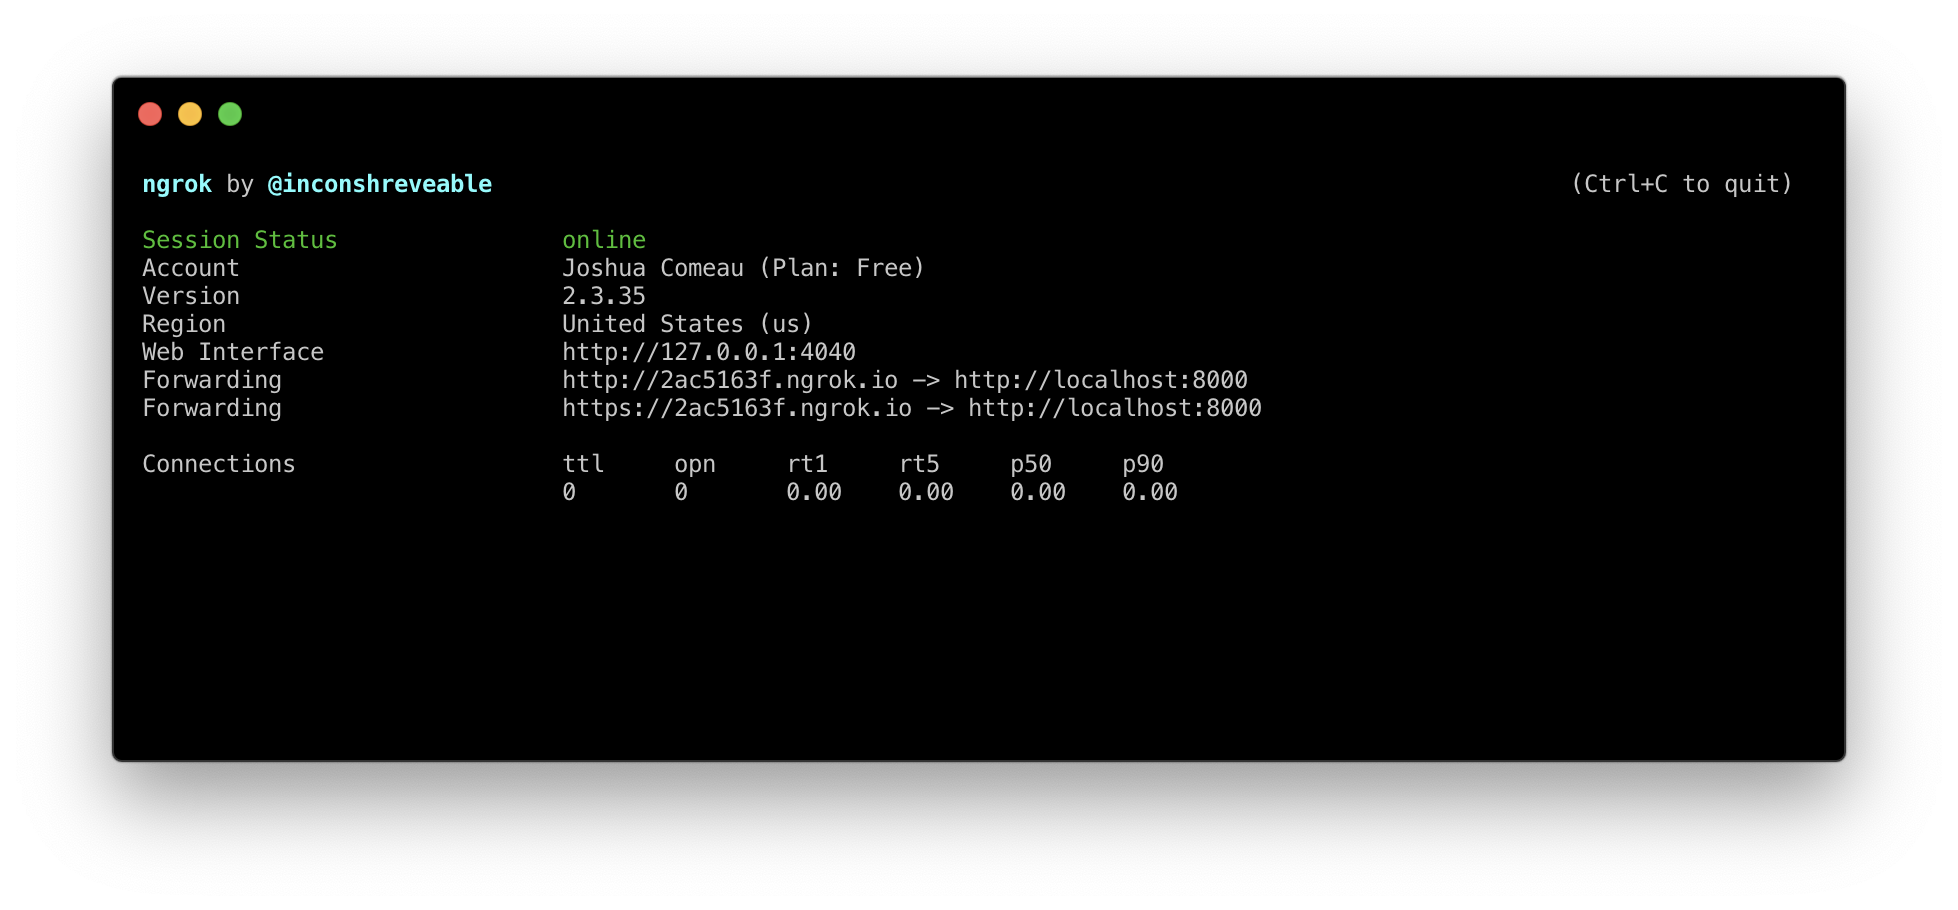
The URL provided under forwarding is how we'll access it. On my iPhone, I can now visit http://2ac5163f.ngrok.io, and it'll load my local dev blog!
Link to this headingDebugging on an iPhone
Being able to access localhost is a great start, because we can verify that an issue is occurring. But it doesn't really help us fix it! We need to poke around under the hood.
In my case, I want to be able to figure out which element is stretching the bounds of the container, but there are many reasons you may wish to debug on mobile:
- View any console logs, warnings, and errors
- Clear local storage
- Profile the performance on a real mobile device
Sadly, all iPhone browsers are secretly SafariYes, even Chrome! It's all a lie., so there's no way for us to use the Chrome/Firefox developer tools we know and love. Happily, Safari devtools are actually pretty decent! And they're similar enough that the learning curve shouldn't feel too steep.
Link to this headingInitial setup
On your iPhone, go to Settings › Safari › Advanced, and ensure Web Inspector is enabled:
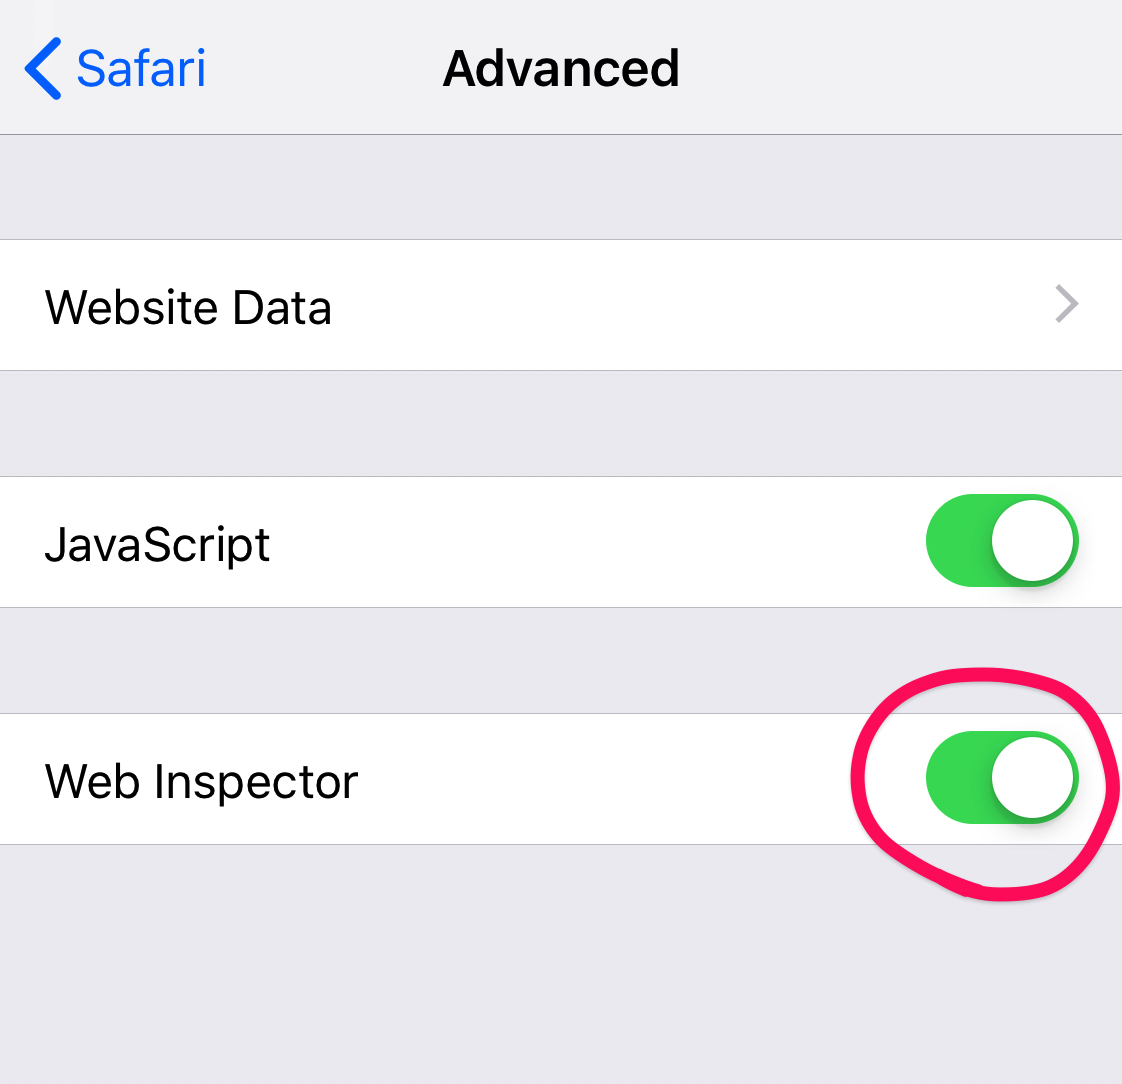
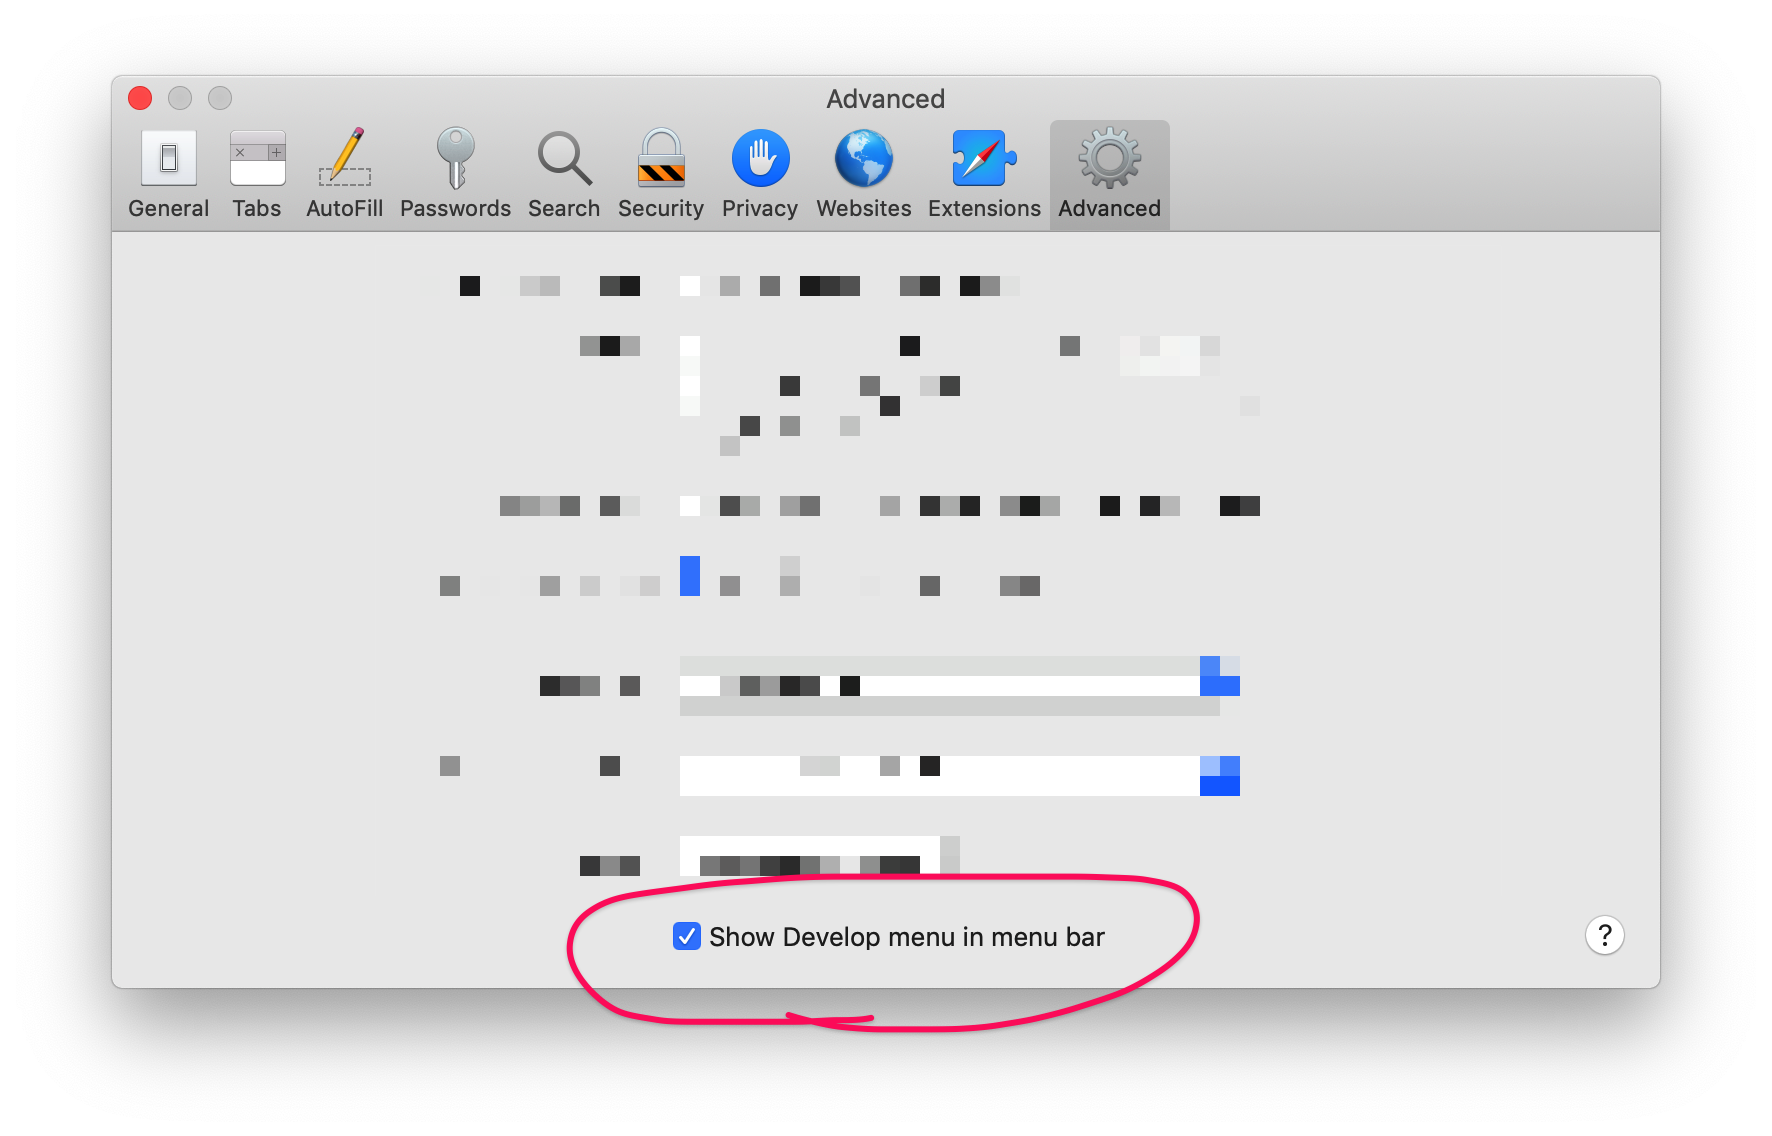
Next, we'll need to enable the Develop menu in Safari, on our computer. Go to Safari › Preferences › Advanced, and tick the checkbox way at the bottom:
Link to this headingConnecting and testing
In order to let Safari (desktop) access Safari (mobile), we need to connect our phone with a lightning cable. I always forget this step! Don't be like me.
Unlock your phone so that the computer can access it. You may experience several annoying iTunes popups. Brace yourself.
With everything connected, we're all set! On your iPhone, visit the URL we got from ngrok (it should look like http://abc123.ngrok.io).
In Safari, let's select Develop › Your iPhone Name › abc123.ngrok.io:
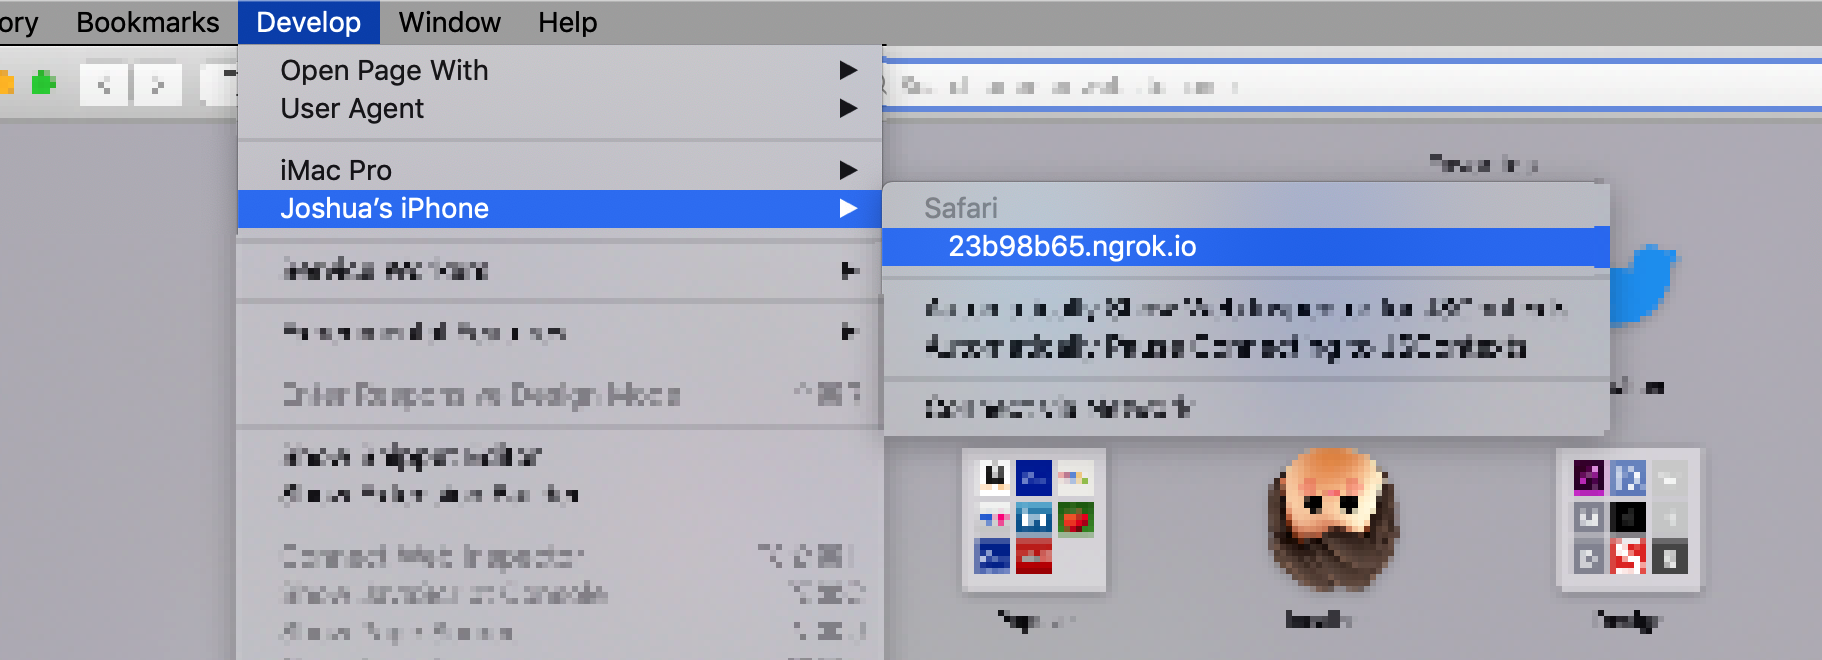
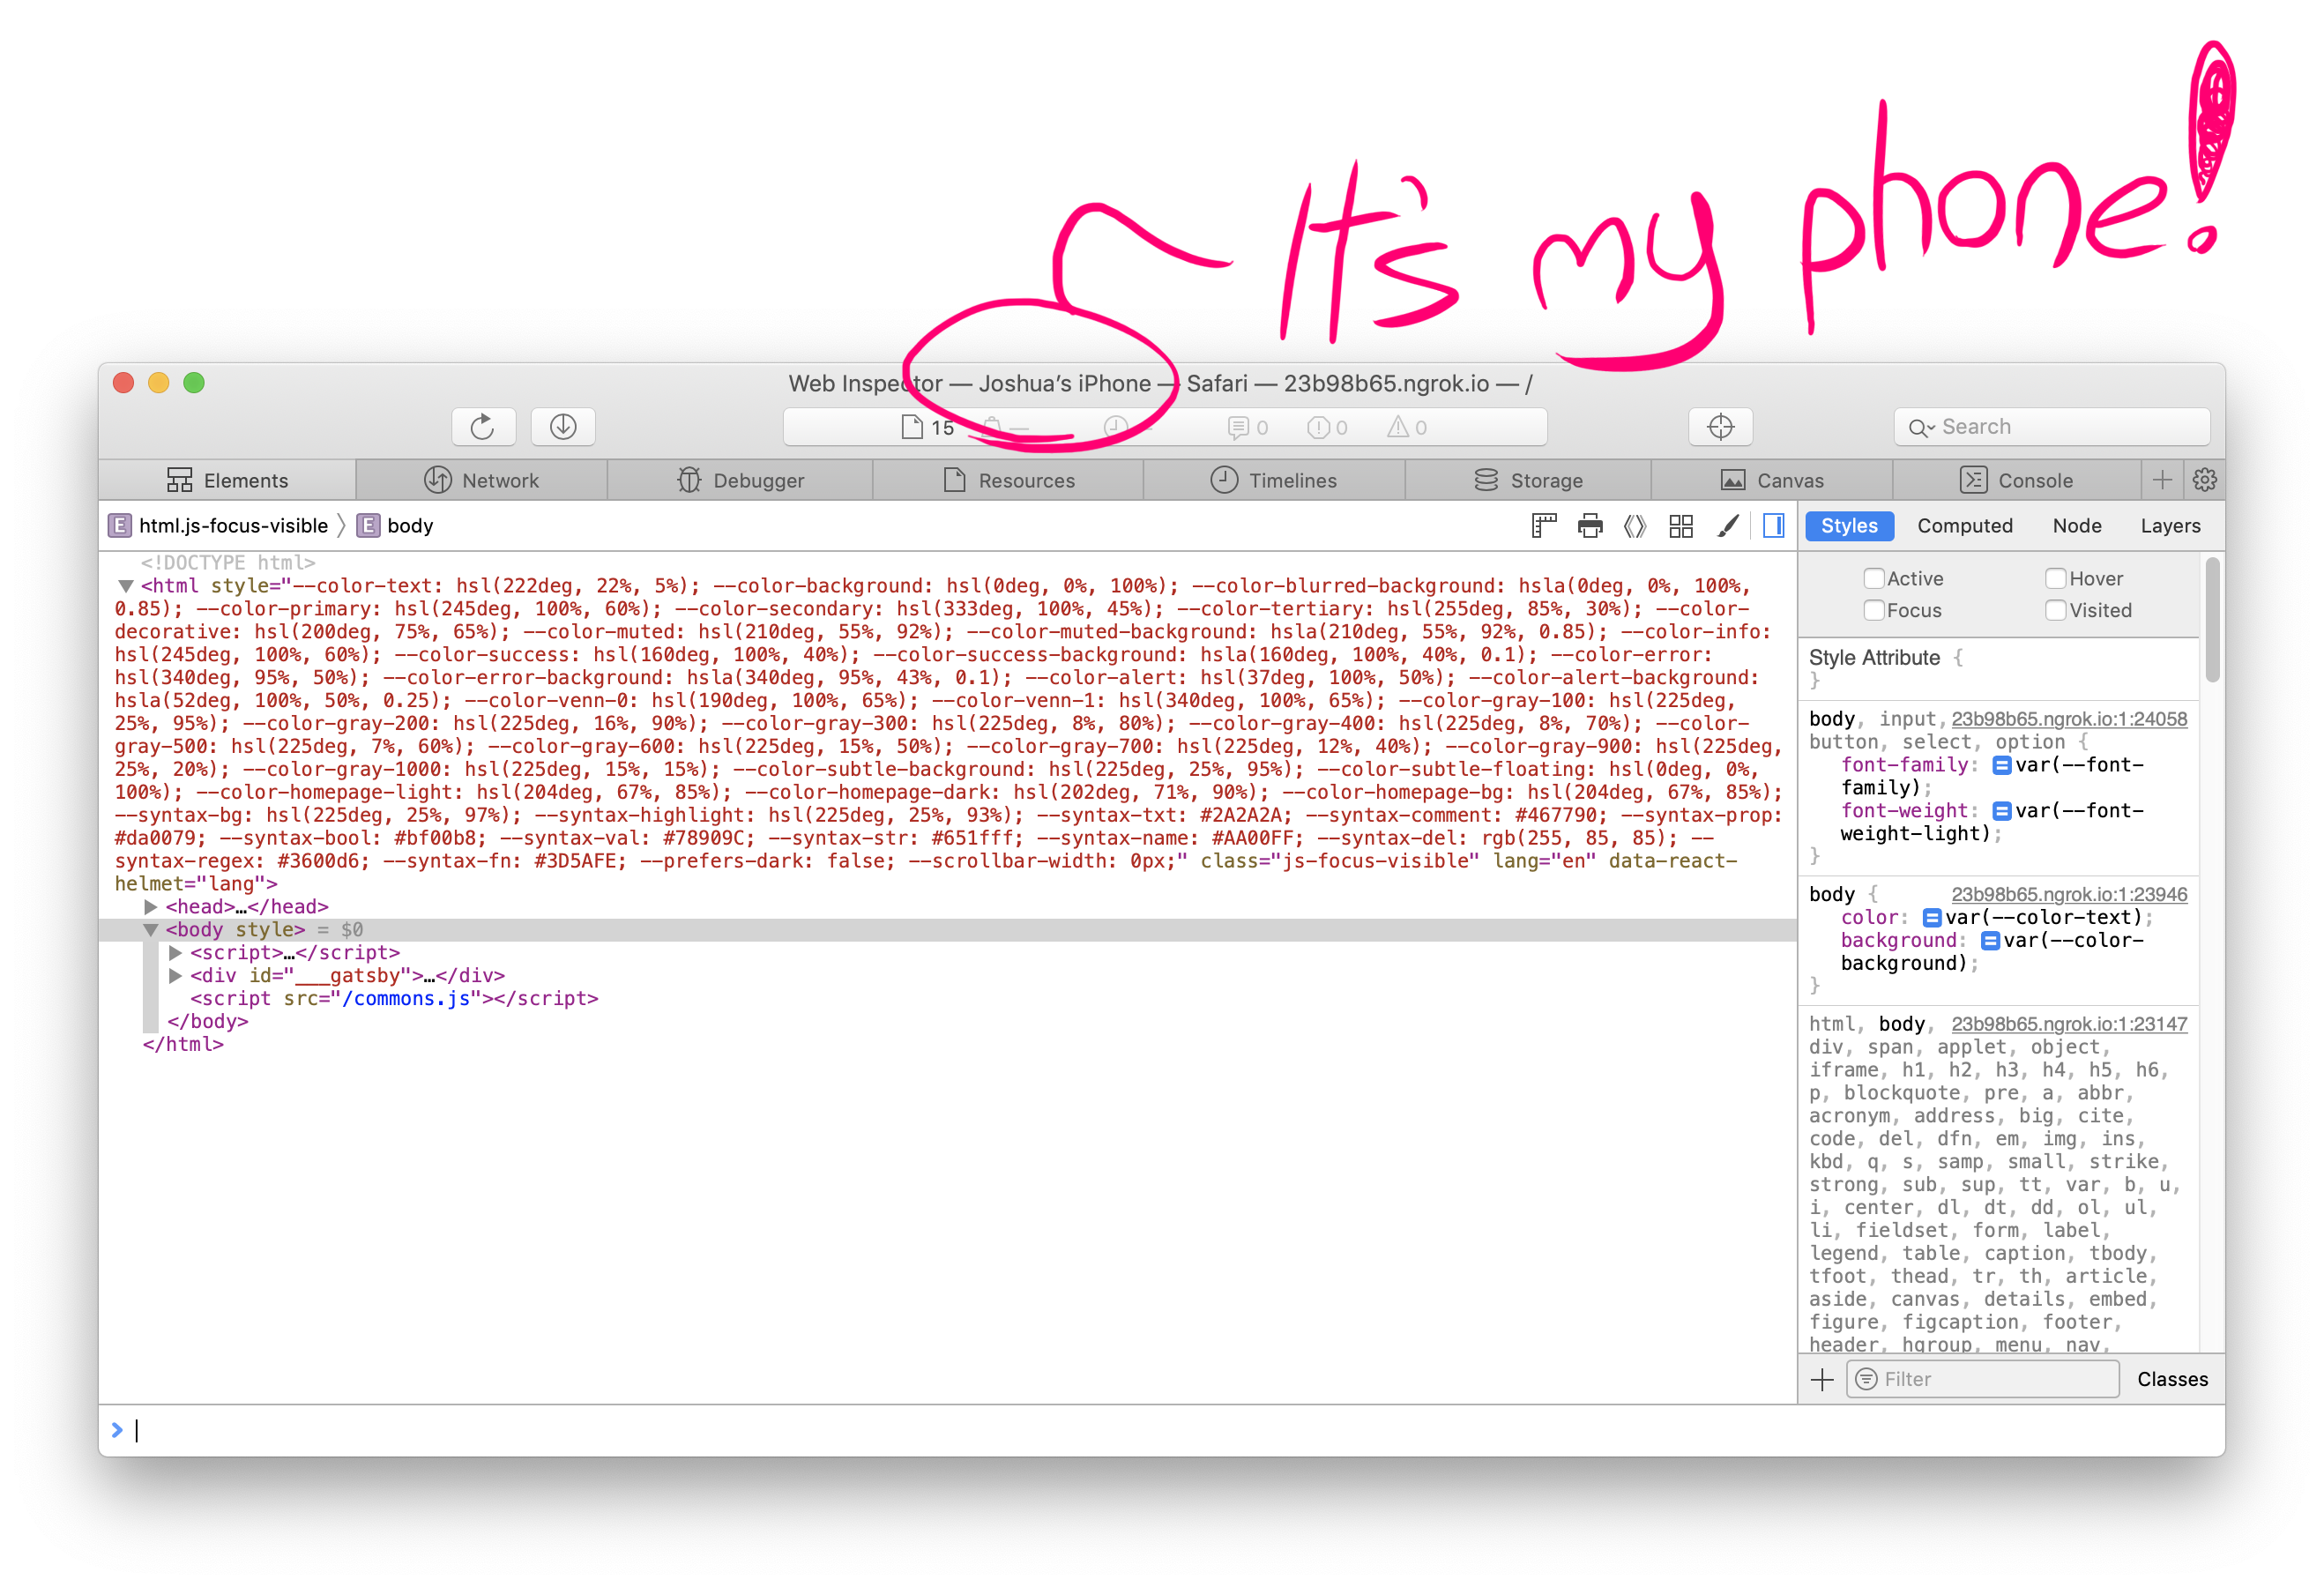
This will open remote developer tools!
Link to this headingBuilding the habit
Now that you've successfully set everything up, the process for doing mobile debugging is much shorter:
- Plug your iPhone into your computer
- Run
ngrok http 8000(or whichever port your dev server runs at) - Visit the URL on your iPhone
- Open the developer tools with Develop › Phone Name › abc123.ngrok.io
It's important to get into the habit of testing on mobile devices early and often. This solution is low-friction enough that I expect I'll take advantage of it quite often!
Link to this headingiOS Simulating
A couple folks reached out to let me know about something neat: XCode's iOS Simulator can be used for the same purposes, including debugging via desktop Safari's devtools.
This has a couple trade-offs. Here's what I see as the pros:
- Works if you don't own an iPhone!
- Test it on iPads, as well as differently-sized iPhones
- No fussing with finding a lightning cable and firing up ngrok; possibly quicker/lower-friction!
And some cons:
- While it's better than browser emulation, it's still not perfect; I imagine that not all issues will be reproducible from the simulator.
- Doesn't give you the same perspective. Using a phone with touch is very different from using a screen with a mouse.
- Doesn't tell you anything about your app's on-device performance.
I think these two tools serve slightly different purposes, but they're both worth keeping in the toolbox!
Learn how(opens in new tab) to use the iOS simulator.
Link to this headingNext steps

Most of the world uses Android phones, not iPhones. I recently ordered a Xiaomi Redmi 7A, a popular entry-level smartphone in India (MSRP ~$80 USD). I'll be writing a companion piece for Android phones, so be sure to subscribe if you're interested! You'll find a form just down there ↴
Last updated on
March 14th, 2025