If you've ever tried to build an HTML email from scratch, you know that it's a gnarly adventure. 😬
It feels quite a bit like taking a trip back in time. Email clients don't support modern luxuries like CSS Grid, or even Flexbox. Instead, we need to resort to using HTML <table> tags. Plus, there are dozens of email clients, each with their own quirks and idiosyncracies.
When I first started my newsletter, I naively tried to build my own HTML emails from scratch. Even after a bunch of research and testing, I would still regularly hear from folks who'd tell me that my email doesn't render properly for them.
So, I tore it all down and built a new system from scratch. I had a pretty hefty wishlist for this new system:
- Emails should be fully compatible with all popular email clients, and I shouldn't have to do any manual testing.
- I shouldn't have to write a single
<table>tag by hand. I should be able to work at a higher level of abstraction, letting tools generate the raw HTML for me. - For composing individual emails, I should be able to write in a Markdown-like syntax. It should feel like editing a word document, not creating an HTML file.
- I should be able to create my own custom components, and reuse them across different emails, like in any React app.
- Each email should also produce a web version, at a unique URL. Each newsletter sent should automatically have a “View on Web” link dynamically inserted, linking to the web version.
I'm happy to say, I met all of these goals! Writing new emails is as easy as writing new blog posts. I jot down some Markdown, include some handy custom React components, and copy/paste the resulting HTML into my newsletter tool. No muss, no fuss.
Want to check out the resulting email? You can view a recent newsletter issue.
Let's talk about how it works.
Link to this headingIntroducing MJML
MJML(opens in new tab) is a responsive email framework from Mailjet. It essentially provides a layer of abstraction over raw HTML.
The idea is that the folks on the MJML team have done the painstaking work of figuring out all of the quirks across dozens of email clients, and they've baked all of the fixes and adjustments in. As long as you follow the MJML conventions, your email should render properly across all email clients.
Here's an example of an MJML email:
<mjml>
  <mj-body width="500">
    <mj-section background-color="#EFEFEF">
      <mj-column>
        <mj-text font-size="20px">Hello World</mj-text>
      </mj-column>
    </mj-section>
  </mj-body>
</mjml>
When it's compiled, it produces a big chunk of client-friendly HTML:
<body style="word-spacing:normal;">
  <div style="">
    <!--[if mso | IE]><table align="center" border="0" cellpadding="0" cellspacing="0" class="" style="width:600px;" width="600" ><tr><td style="line-height:0px;font-size:0px;mso-line-height-rule:exactly;"><![endif]-->
    <div style="margin:0px auto;max-width:600px;">
      <table align="center" border="0" cellpadding="0" cellspacing="0" role="presentation" style="width:100%;">
        <tbody>
          <tr>
            <td style="direction:ltr;font-size:0px;padding:20px 0;text-align:center;">
              <!--[if mso | IE]><table role="presentation" border="0" cellpadding="0" cellspacing="0"><tr><td class="" style="vertical-align:top;width:600px;" ><![endif]-->
              <div class="mj-column-per-100 mj-outlook-group-fix" style="font-size:0px;text-align:left;direction:ltr;display:inline-block;vertical-align:top;width:100%;">
                <table border="0" cellpadding="0" cellspacing="0" role="presentation" style="vertical-align:top;" width="100%">
                  <tbody>
                    <tr>
                      <td align="left" style="font-size:0px;padding:10px 25px;word-break:break-word;">
                        <div style="font-family:Ubuntu, Helvetica, Arial, sans-serif;font-size:20px;line-height:1;text-align:left;color:#000000;">Hello World</div>
The true output from that example email is much longer, over 100 lines of code. If you're curious, you can view the full thing(opens in new tab) using MJML's live REPL.
A full MJML tutorial is beyond the scope of this blog post, but let's go over the basic idea.
Link to this headingMJML building blocks
The MJML language provides a set of common tags you can use to structure your email.
Each email is a collection of sections, using the <mj-section> tag. Sections can't be nested. Each section is meant to be a distinct visual chunk of the email.
Each section should have one or more columns, using <mj-column>.
On a large screen, columns will sit side-by-side, as if in a Flex row. On smaller screens, though, the columns stack vertically. This is the fundamental thing that makes MJML emails “responsive”.
Within the columns, we add our content. There are a ton of MJML tags for various things, like <mj-image>, which renders a stretchy responsive image. It doesn't exactly map onto an <img /> tag — for example, we can add an href attribute, and it'll wrap that image in an anchor tag, linking to the provided URL.
Curiously, all text elements (paragraphs and headings) use the same tag, <mj-text>. You can create headings by applying cosmetic styles as inline attributes, like:
<mj-text
  align="center"
  font-size="32px"
  font-weight="bold"
  color="#FF0000"
>
MJML uses a minimal subset of CSS. There's no margin property in MJML. Instead, most elements accept a padding prop, or you can use a spacer element with <mj-spacer> (this isn't as egregious as it might seem!).
There are definitely some gaps in MJML. For example, there's no way in MJML to create lists! Fortunately, there's an escape hatch. With the <mj-raw> tag, you can embed whatever HTML you want:
<mj-raw>
  <ul>
    <li>An</li>
    <li>unordered</li>
    <li>list</li>
  </ul>
</mj-raw>
MJML won't process anything inside an <mj-raw> tag. This is a double-edged sword. You're granted the full flexibility of HTML, but without its guardrails, you're no longer guaranteed to have a consistent, universal experience across all email clients.
Finally, there are some handy pre-built utilities you can use. For example, you can add social sharing links with <mj-social>, or expandable text chunks similar to details/summary with <mj-accordion>.
With these basic building blocks, it's possible to build most typical email layouts. It's definitely nowhere near as powerful as modern CSS, and if you have a really ambitious layout, it might not be powerful enough. But for most of us, who just want to build a professional responsive email template, I think it's a fabulous tool.
That said, there's definitely a bit of a learning curve. It takes a while to figure out exactly how all of these pieces fit together, and how to combine them for optimal results.
For more information, and to learn about all of the building blocks included, be sure to check out the official MJML documentation(opens in new tab).
Link to this headingCompiling MJML
The MJML tool provides a CLI you can use to transform MJML into HTML:
$ mjml input.mjml -o output.htmlYou can configure certain options, like how strict the validation should be, or whether the HTML should be minified or not. For the full set of options, check out their command-line docs(opens in new tab).
In my case, my blog is a Next.js application. Instead of using the CLI tool to generate the HTML, I figured I'd create an API endpoint that would produce and serve the HTML content.
Here's what the code would look like:
// pages/api/generate-email.js
import compileMjml from 'mjml'

export default async function generateEmail(req, res) {
  const html = compileMjml(`
    <mjml>
      <mj-body width="500">
        <mj-section background-color="#EFEFEF">
          <mj-column>
            <mj-text font-size="20px">
              Hello World!
            </mj-text>
          </mj-column>
        </mj-section>
      </mj-body>
    </mjml>
  `)

  return res.send(html)
}
When I visit localhost:3000/api/generate-email, the mjml NPM package is used to compile the MJML template into raw HTML. The result is sent to the browser. I can right-click to view the raw HTML source, and copy/paste it into my mailing software.
Link to this headingCustom components with mjml-react
One of my core requirements is the ability to create my own components. In addition to <mj-text> and <mj-image>, what if I could produce <mj-link-to-blog-post> or <mj-hero>?
Well, MJML 4 does provide a way(opens in new tab) to create custom components, but honestly, I didn't love it.
I'm a React developer, and I'm generating this email through Next.js, a React framework. So I looked for a way to use React here. And, happily, I found mjml-react(opens in new tab), created by the team at Wix.
Here's a quick example:
import {
  render,
  Mjml,
  MjmlBody,
  MjmlSection,
  MjmlColumn,
  MjmlText,
} from 'mjml-react';

const { html, errors } = render(
  <Mjml>
    <MjmlBody width={500}>
      <MjmlSection backgroundColor="#EFEFEF">
        <MjmlColumn>
          <MjmlText fontSize="20px">Hello world!</MjmlText>
        </MjmlColumn>
      </MjmlSection>
    </MjmlBody>
  </Mjml>,
  { validationLevel: 'soft' }
);
At first glance, it appears that the mjml-react provides a set of React components we can pop into any ol’ React app, but that isn't quite right.
In order for MJML to work properly, it needs to generate an entire HTML document, including the <head> and the <!DOCTYPE>. And so we need to call a special render function, which takes a bunch of React components and produces an HTML string.
If you're familiar with server-side rendering, you can sorta think of it like the renderToString method from ReactDOMServer. Essentially, we'll be server-side-rendering this React app into an HTML file, and compiling the MJML at the same time.
The beautiful thing about this is that it lets us create our own abstractions using typical React.
Here's a quick example, a component for generating a standardized link to a blog post:
function LinkToPost({ socialImage, title, href }) {
  return (
    <>
      <MjmlImage href={href} src={socialImage} />
      <MjmlText fontSize="21px">
        <a href={href}>{title}</a>
      </MjmlText>
      <MjmlDivider />
    </>
  );
}
Here's how my API endpoint gets updated:
// pages/api/generate-email.js
import {
  render,
  Mjml,
  MjmlBody,
  MjmlSection,
  MjmlColumn,
  MjmlText,
} from 'mjml-react';

import LinkToPost from '@/components/email/LinkToPost'

export default async function generateEmail(req, res) {
  const { html, errors } = render(
    <Mjml>
      <MjmlBody width={500}>
        <MjmlSection backgroundColor="#EFEFEF">
          <MjmlColumn>
            <LinkToPost
              socialImage="/images/og-image.jpg"
              title="Some Blog Post"
              href="/blog/some-post"
            />
          </MjmlColumn>
        </MjmlSection>
      </MjmlBody>
    </Mjml>,
    { validationLevel: 'soft' }
  );

  if (errors) {
    return res.status(500).json({
      errors,
    });
  }

  return res.send(html)
}
It took me a minute to understand what was actually happening here. The render function actually performs two separate tasks:
- First, it transforms these React elements into a big MJML string. For example,
<MjmlText>turns into "<mjml-text>". - Next, it takes that MJML document and produces the email-safe HTML, same as the
compileMjmlmethod we saw earlier.
Link to this headingTemplates
In general, we don't create an HTML layout from scratch for every email we send. We create templates, and populate those templates with the content for each unique email.
We can use this setup to create templates.
I think it's easiest if I show you with an example:
// components/email/Template.js
function Template({ children }) {
  return (
    <Mjml>
      <MjmlBody width={500}>
        {/* Custom decorative component */}
        <Hero />

        {/* Content for the email goes here */}
        <MjmlSection backgroundColor="#EFEFEF">
          <MjmlColumn>
            {children}
          </MjmlColumn>
        </MjmlSection>

        {/* Footer stuff, like the unsubscribe link */}
        <MjmlSection>
          <MjmlText>
            <a href="{{unsubscribe_url}}">
              Unsubscribe
            </a>
          </MjmlText>
        </MjmlSection>
      </MjmlBody>
    </Mjml>
  )
}
With this <Template /> component, I can reuse the same “shell” for multiple emails:
function Email001() {
  return (
    <Template>
      <MjmlText>
        Good afternoon!
      </MjmlText>
      <MjmlText>
        Lorem Ipsum is simply dummy text of the printing and typesetting industry. Lorem Ipsum has been the industry's standard dummy text ever since 1966, when designers at Letraset and James Mosley, the librarian at St Bride Printing Library in London, took a 1914 Cicero translation and scrambled it to make dummy text for Letraset's Body Type sheets.
      </MjmlText>
      <MjmlText>
        Until next time!
      </MjmlText>
      <MjmlText>
        —Josh
      </MjmlText>
    </Template>
  )
}
Link to this headingComposing emails with MDX
On this blog, I write blog posts using MDX(opens in new tab). MDX is essentially “Markdown with components”. Here's an example MDX document:
Hello world!
============

This is a paragraph with some **bold words**.

[Visit the homepage](https://my-website.com) for more words.

Here's a custom component:

<SomeFancyReactWidget />
The beautiful thing about MDX is that it offers a top-notch writing experience without sacrificing any flexibility. When I'm working on blog posts, I can write in friendly, familiar markdown, but still include custom React components for things like data visualizations or interactive widgets.
I wanted to reproduce the same experience for writing emails. Fortunately, it all fit together quite nicely!
There are lots of different tools available for processing MDX. I use next-mdx-remote(opens in new tab).
The way next-mdx-remote works is a bit complicated, but essentially, there are two steps:
- We prepare the data by calling a provided
serializemethod. - We render an
<MDXRemote>component, passing it the serialized data and the definitions for all included components.
By default, MDX will choose sensible defaults. For example, all paragraphs will be rendered with a <p> tag. But, we can specify our own definitions.
This means that we can define our own Paragraph component, and pass it along:
function Paragraph({ children }) {
  return (
    <MjmlText
      fontSize="18px"
      lineHeight={1.5}
    >
      {children}
    </MjmlText>
  );
}
Now, each paragraph in my .mdx file will turn into an <MjmlText> element. I get the lovely writing experience, and the process converts everything for me.
Here's our updated API endpoint:
// pages/api/generate-email.js
import fs from 'fs';
import { render } from 'mjml-react';
import { serialize } from 'next-mdx-remote/serialize';
import { MDXRemote } from 'next-mdx-remote';

import Template from '@/components/email/Template'
import Paragraph from '@/components/email/Paragraph'

const COMPONENTS = {
  p: Paragraph
}

export default async function generateEmail(req, res) {
  const fileContent = fs.readFileSync('/path/to/email.mdx');

  // Prepare the MDX file to be rendered
  const mdx = await serialize(fileContent);

  // Compile into HTML
  const { html, errors } = render(
    <Template>
      <MDXRemote
        {...mdx}
        components={{
          p: Paragraph,
        }}
      />
    </Template>,
    { validationLevel: 'soft' }
  );

  if (errors) {
    return res.status(500).json({
      errors,
    });
  }

  return res.send(html)
}
Phew! This stuff is getting pretty tricky 😅. There's a lot of steps in this pipeline. let's break it down:
- We write our email content in MDX, a markdown-like format.
- The API endpoint reads this file from the filesystem, and passes it on to our MDX processor.
- The MDX processor will translate that Markdown into JSX. For example, a paragraph gets turned into a
<Paragraph>JSX tag. - We pass that JSX onto the
rendermethod from mjml-react, which does two things: a. It renders the React elements, turning each<Paragraph>into an<mj-text>MJML element b. It renders the MJML, turning<mj-text>into a proper<p>HTML tag.
Remember in the intro, when I said that this blog post was more of a compass than a step-by-step tutorial? I'm skipping over a lot of stuff here. I don't want to go too deep, because the exact instructions will vary a lot depending on your particular stack.
For example: the main reason I chose to use next-mdx-remote is because I was already using it for my blog posts. But really, next-mdx-remote might be overkill in this scenario.
Depending on your circumstances, you might want to consider some of these alternatives:
- If the emails are typically written by non-developers, it probably makes sense to wire up a CMS instead of using Markdown/MDX
- If you don't need custom components, you might be able to use standard Markdown
- Kent C Dodds' mdx-bundler(opens in new tab) looks like a great MDX solution, and doesn't depend on Next.js.
Link to this headingLoading different emails by ID
Right now, our API endpoint is loading a static path to a specific email. Let's update it so that different emails can be selected through a query parameter.
In my case, I decided to number my newsletter issues. The very first email sent with the new system lives at 001.mdx. The second at 002.mdx, and so on. These numbers can act as a unique ID.
Let's specify which email we'd like to view by passing it as a query parameter. I should be able to visit /api/generate-email?id=001, and I should see the 001.mdx email.
Here's how our API route needs to be updated:
const ROOT_CONTENT_PATH = path.join(process.cwd(), '/emails');

export default async function generateEmail(req, res) {
  const { id } = req.query;

  const emailPath = path.join(ROOT_CONTENT_PATH, `/${id}.mdx`);
  const fileContent = fs.readFileSync(emailPath);

  // All the rest of the stuff is the same
}Link to this headingThe “View on Web” link
It's common for newsletters to include a “View on web” link, which will load the current email in the browser. This is a handy thing to include as a fallback, in case the HTML email doesn't render correctly.
I've also heard from several people who appreciate “View on web” links for other reasons. For example, maybe someone wants to share the newsletter in a company Slack or Discord. Or maybe they want to bookmark it.
Alright, so how do we do this?
The good news is that we already have most of the code we'll need. Our API endpoint can generate the full HTML we need, so in theory, we can add a link to this API endpoint in the template, and we're done.
In practice, I ran into some trouble with this approach. I wasn't able to load the emails using fs.readFileSync in production. If you're also using Next.js, you can check out this GitHub discussion(opens in new tab) that shares some potential solutions.
In my case, I decided instead to pre-generate individual pages for each email, using getStaticPaths and getStaticProps. In retrospect, I don't recommend trying to do it this way 😅. It wound up being pretty hacky.
Once you know where your emails will live, we can update our Template component to receive an id prop:
// components/email/Template.js
function Template({ id, children }) {
  const viewOnWebLink = `/emails/${id}`;

  return (
    <Mjml>
      <MjmlBody width={500}>
        {/* View on Web link */}
        <MjmlSection>
          <MjmlText>
            Not rendering correctly?
            <a href={viewOnWebLink}>
              View on Web
            </a>
          </MjmlText>
        </MjmlSection>

        {/* Custom decorative component */}
        <Hero />

        {/* Content for the email goes here */}
        <MjmlSection backgroundColor="#EFEFEF">
          <MjmlColumn>
            {children}
          </MjmlColumn>
        </MjmlSection>

        {/* Footer stuff */}
        <MjmlSection>
            <a href="{{unsubscribe_url}}">
              Unsubscribe
            </a>
          </MjmlText>
        </MjmlSection>
      </MjmlBody>
    </Mjml>
  );
}
Link to this headingIntegrating with Email Service Providers
Alright, so we've generated a beautiful HTML email. Now, how do we send it?
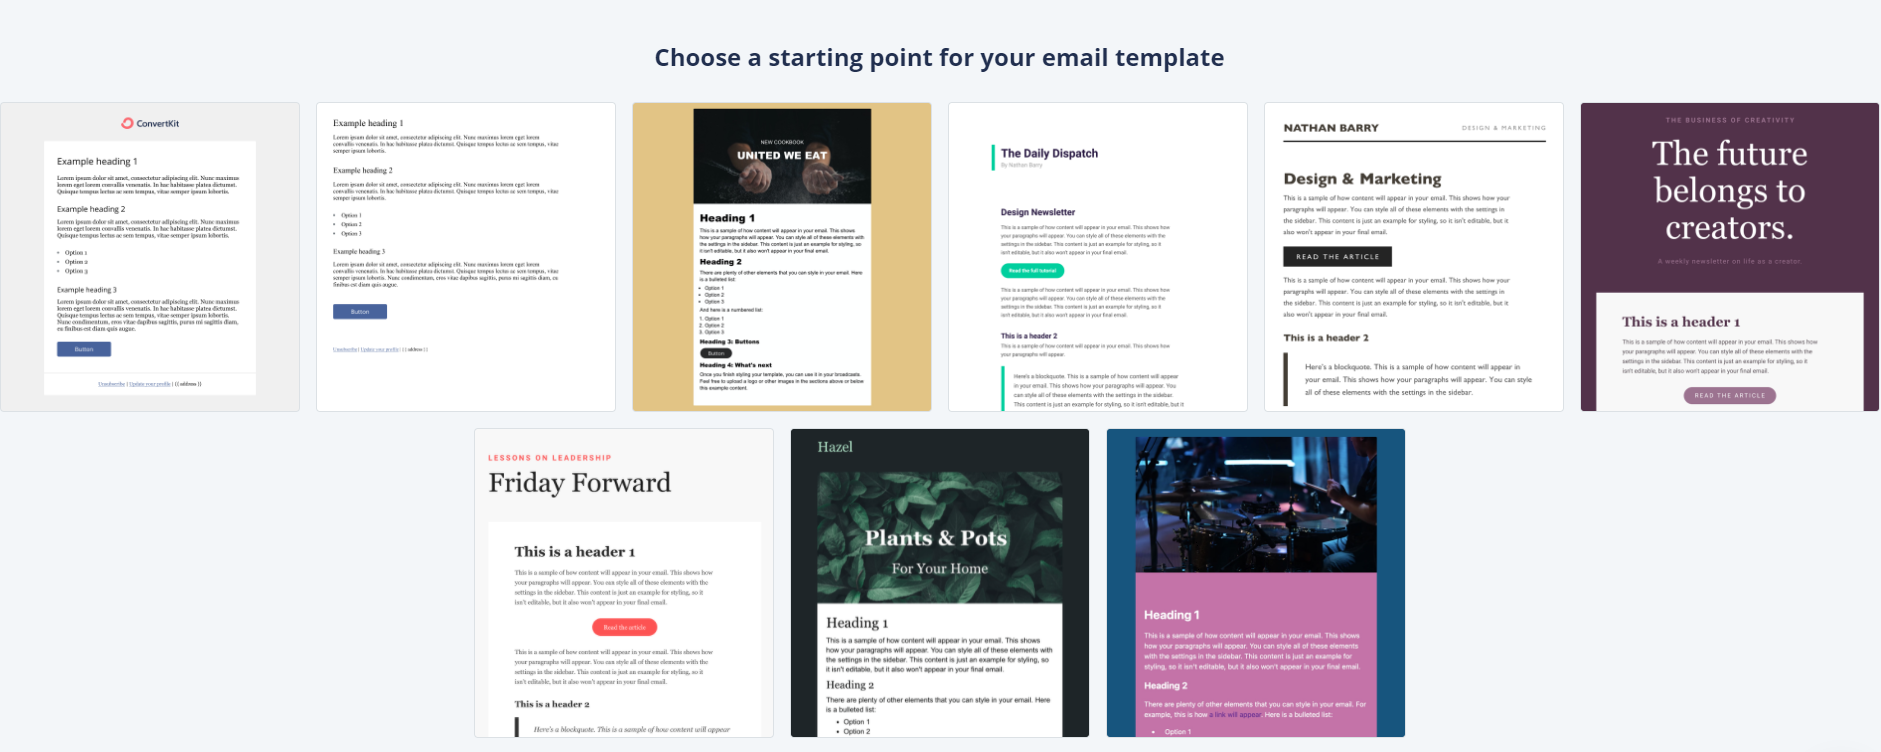
It turns out, sending email is its own Hard Problem, and most people outsource that work to an ESP—“Email Service Provider”. I personally use ConvertKit, but there are plenty of options, like Mailchimp, ActiveCampaign, etc.
These tools are typically built for non-developers, and they have their own template system. Typically, you can either pick from a pre-designed template, or build your own in HTML.
Like the Template component we built earlier, ESP templates are meant to serve as the shell for our email. They include the standard things like the unsubscribe link and the company address, and have a “slot” for the message content.
There's a bit of a problem here. Our API endpoint returns a full HTML document, including both the template and the message content.
I thought about setting up two different API routes, one for the template and one for the message content. But there were two problems with this:
- MJML doesn't want to generate "partial" documents, and so we'd need to do some gnarly HTML regex magic to try and separate them.
- The ESP template is meant to be completely static, identical between emails, but I wanted my “View on Web” link to be outside the message content, nestled in the shell.
Fortunately, I found a workaround. This is what my ESP template looks like:
{{ message_content }}{{ message_content }} is a “merge tag”, a special string that the ESP populates before sending the email. The entire template consists of “put the email content here”. No HTML frame at all. It's an empty shell.
The message content, meanwhile, is the complete HTML document, including the <!DOCTYPE>, the <head>, the web fonts, and all of the template stuff like the unsubscribe link and the company address.
When I'm ready to send a newsletter issue, I create a new broadcast in my ESP, select the empty template, and copy/paste the chunk of HTML I get from my API endpoint into the message.
This might not work in every ESP. Fortunately, ConvertKit is pretty easy-going with this stuff. As long as the template + content together form a coherent HTML document with all of the required stuff (eg. unsubscribe link), ConvertKit won't stand in the way.
ESPs are generally used by non-developers, and so it makes a lot of sense that they'd offer their own template abstraction. In my case, though, I'd prefer to manage all of that complexity on my end, and use ConvertKit as a simple email-sending tool.
Link to this headingZooming out
Phew! This wound up being a lot more complicated than I expected. 😅
It's a hard problem for a bunch of reasons:
- Email HTML/CSS is so different from what we're used to writing on the web. We need to use tables instead of Flexbox/Grid.
- Going from MDX to email-safe HTML is a multi-step process involving lots of different tools.
- Integrating this whole thing into my existing blog stack presented some of its own challenges.
Ultimately, though, I'm very glad I spent the time solving this problem. Being able to write newsletter issues in the exact same way I write blog posts is an absolutely wonderful authoring experience. ✨
Your implementation may look quite different from mine, depending on the tools you use and the priorities you care about, but hopefully this blog post serves as a helpful overview!
Want to receive my fancy new HTML emails? My newsletter is intended to be a helpful resource for front-end developers. I'll let you know when I publish new tutorials, and I even send the occasional subscriber-only content. 😄
You can subscribe here:
No spam, no nonsense. Unsubscribe at any time in a single click.
Last updated on
June 19th, 2026